Poster board + masking tape + aluminum foil = make shift reflector
None of these image have been modified
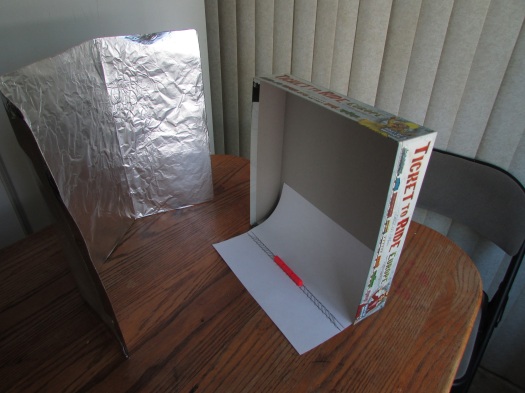
Here’s the before and after shots using light from north facing window:
No reflector
With reflector

Poster board + masking tape + aluminum foil = make shift reflector
None of these image have been modified
Here’s the before and after shots using light from north facing window:
No reflector
With reflector
After a failed uninstall-new-install on the server last week, I decided
to change from zp to koken (which in itself was difficult to get
installed through the host). Now don’t get me wrong, Zen photo had many
nice features – some that I would like to see in other galley programs –
but it was purely a moment of frustation that made me decide to click on
koken rather than zp again.
Pros of Zp:
Pros of Koken
—————————————————————–
To try to find some sort of cohesion, I utilized the css from koken into
my main site. At the end of the day, I want three things:
No, I haven’t fallen off the face of the earth (if anyone was wondering, which you probably weren’t – but in case you were). I’ve just been busy with life and everything that comes along with. That said, my project of redesigning the site has not completely left me. So here I am – long after the last, to continue on!
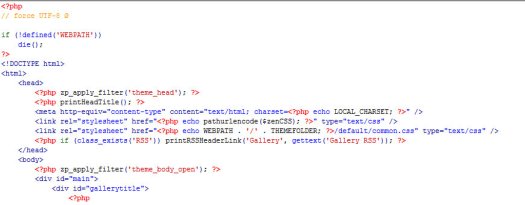
Here you can see the index.php from my themes folder. My goal is to first make room for my ads. About half way down you will see a div with the id class of “padbox”. I’m gonna start there and see what the page does when I toss responsive ad code in there: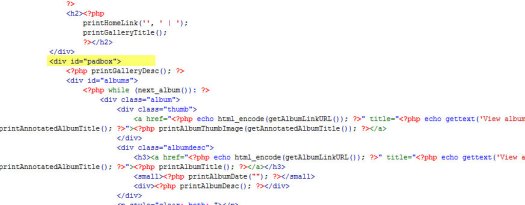
*as always, make a copy of your index.php before editing and uploading just in case everything goes wrong – I also added a line of code near the closing body tag – *
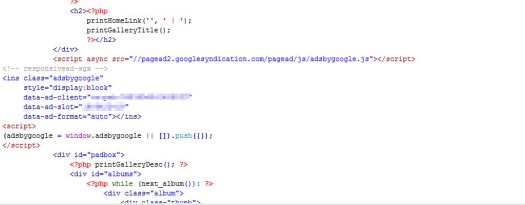
So now our index.php has a couple of ads on it. Make sure to also edit the album.php, image.php and search.php. At this point, my goal is to just get my ads on the page as well as my analytics code. Lets go ahead and toss that in too between the opening & closing head tag.
Once I get these in line, I will focus in on the actual css to restyle the page – but for now I’m just trying to get some of my usually-forgotten basics in.
It’s almost overwhelming to think about the gallery page as a whole right now. No new pictures have been added, most of them still need edited through the zenphoto admin control panel (description, name, tags, etc). So much to do, so little time. Now I gotta go the the grocery store, so I’ll shoot another update at a later time. Sorry for the seemingly dragging of my feet – it’s not intentional!
Side note: this is not exactly where I wanted to end, but this is the progress I’ve made in the last half hour. Busy, busy, busy!
So I have used gallery3 project as my gallery portal since 2013, though
the developers have stepped back from it and I was left reluctantly
dragging my feet to find a new method for displaying the gallery section
of soft-graphix.
Zenphoto is an option on my host, and after a quick bit of research, I
decided to give them a try. Reviews looked promising, the community was
active and there are some nice examples of what their gallery is capable
of. In fact, the more I use it, the more excited I am about using it
(although at this point, I’m knee-deep in migrating the existing files
from the gallery3 project to zenphoto – that and my daily life leaves me
with very little time!).
So this post is primarily my learning process in minor css editing to
change the general look of my new gallery page. First, it should be
noted that I copied the default theme page (make sure you activate this theme in http://YOUR-WEB-SITE.com/zp-core/admin-themes.php); we’ll be working off of that.
Here’s a snippet of code from the index.php file:
========================================================
<body>
<?php zp_apply_filter(‘theme_body_open’); ?>
=========================================================
The css for this is located in:
/clickandbuilds/ZenPhoto/themes/YOUR FOLDER*/styles
In my case, “YOUR FOLDER” is copy_of_default
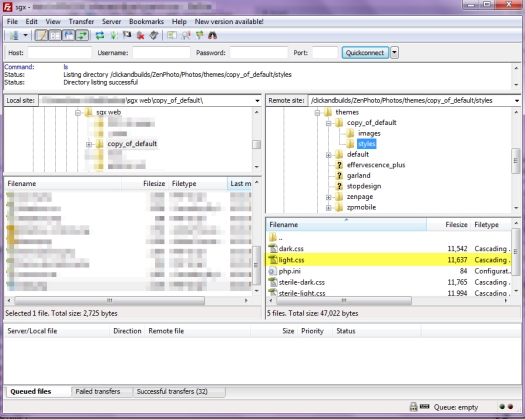
I’m using the default light.css theme. Here’s the default style for:
#main {
text-align: left;
margin: 20px auto;
width: 685px;
background: #fff;
padding: 20px 30px 70px;
border-top: 1px solid #E6E6DF;
border-right: 1px solid #E6E6DF;
border-bottom: 5px solid #E6E6DF;
border-left: 1px solid #E6E6DF;
}
==========================================================
Lets see what happens when we change the width:
#main {
text-align: left;
margin: 20px auto;
width: 100%;
background: #fff;
padding: 20px 30px 70px;
border-top: 1px solid #E6E6DF;
border-right: 1px solid #E6E6DF;
border-bottom: 5px solid #E6E6DF;
border-left: 1px solid #E6E6DF;
}

==========================================================
Awesome. So I have located the css to make style changes. At this point, I’m going to end this post (and hopefully remember to continue to the next step) and eat dinner.
My next step is actually going to be to head back to step one and start fresh on ANOTHER complete over-do of my main page as well as continue down the path of migrating images and adding title, tags & descriptions.
So here I leave it, a mess as usual. Setting a deadline for myself: have site redone by this weekend, including styling new gallery page.
In small areas, use the heal or patch tool (depending on your photo editing software) to select areas you want to fix and clone. I have found using the tool in smaller areas produce less patchy results:

Original Image – No Edits
Stray hair removed
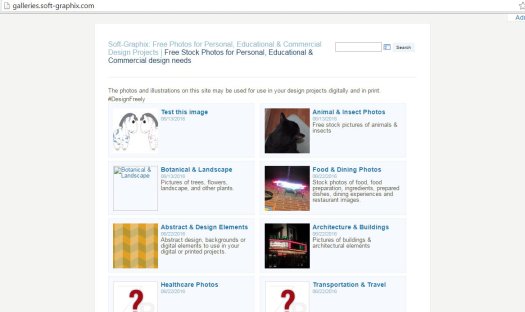
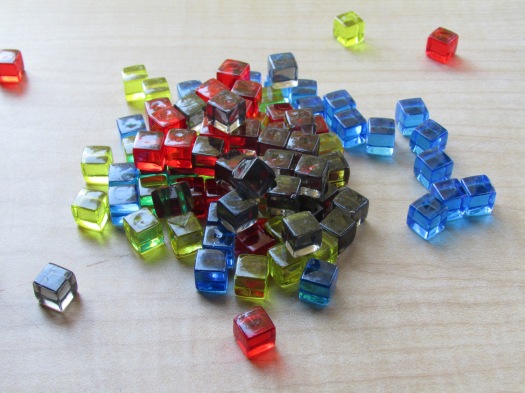
If you’re interested, you can see the final result with saturation turned up and surface cleaned up here: http://galleries.soft-graphix.com/colored-cubes
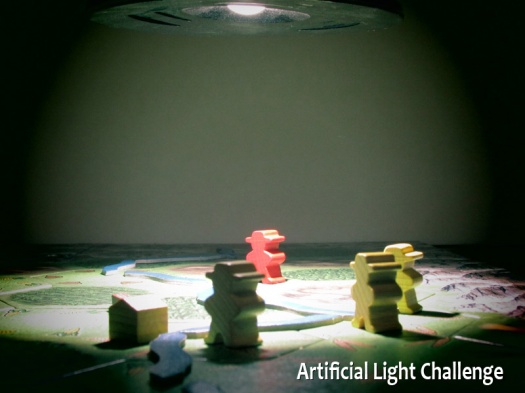
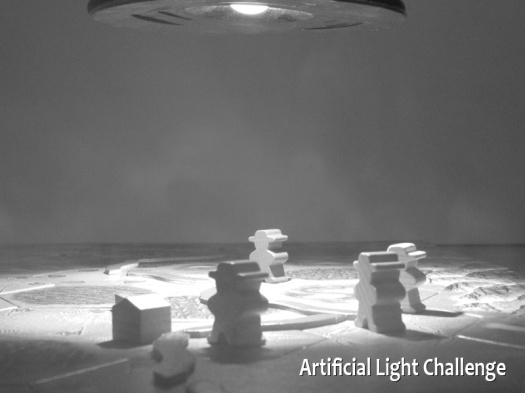
Over the weekend I entered a photo challenge titled “artificial light”. This was the first photography challenge I’ve entered and at first I was very pleased with what results I was able to present; however, the more I look at it the more I second guess some of the decisions I’ve made. This post is dedicated to that experience and what I’ve learned in the process.
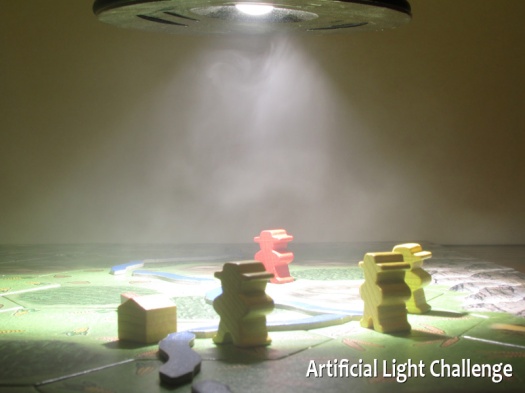
This was my entry – I wish I had less exposure & changed the angle of the camera so the corner of the table was not visible.
My first camera was a Canon AE-1 that I bought in college many moons ago. The price tag at that time: $500.00. There is something powerful about capturing an image only from a view finder and then developing pictures in a dark room by placing sheets into a chemical bath. While I may not make it sound all that romantic, the outcome was always awe-inspiring – partly because, as the photographer, you were finally presented with the outcome of your art. I know I’m rambling, but my point was that you captured that image looking through a view finder and basically cropping, framing, angling and capturing the light content right then and there. We didn’t have photo editing software to nit-pick the imperfections out (though we could control how long we allowed the negative to expose on the sheet and also crop the image). This forced us as students to become very conscious of what we were looking at and how the camera was interpreting it.
As life continued on for me, I put my camera aside for many years – only pulling it out when I had an extra $20 to spend on film and developing said film. Then digital cameras became the go-to (and I’m not complaining; cost-wise & ease of use, I love what the digital cameras have brought to the table). Looking back at my experience with the two different technologies and joining that photo challenge opened my eyes to the fact that I’ve been treating my personal digital photo taking adventure poorly. I look at the small screen on the back of my point-and-shoot, click the button and [usually] edit my digital photo. By no means is this a bad or wrong way to go about it, but the recent challenge presented a problem if that’s the way I’ve been doing things (unless of course I’ve misinterpreted the rules of the challenge). Upload unedited, raw images straight from the camera.
You need to compose in the shot. Your whole thought process changes when you can only upload one photo, and that photo may not have any edits. I began thinking of what I could shoot that entailed ‘artificial light’. When I finally decided to do a photo shoot of a board game I set up the game and started playing by myself just to get pieces out organically. I placed this cheap drafting / table lamp I had on the table. The original idea was to get the whole lamp in the shot so you could see the neck of it angled, hopefully centered over the board game. Behind it I placed a cheap white form board that we had bought for a school project some time ago, though never used. As I playing with positioning my camera it became apparent that that shot I WANTED was not going to happen because the board was too small to get the whole image without the wall and window blinds peaking out from behind it.
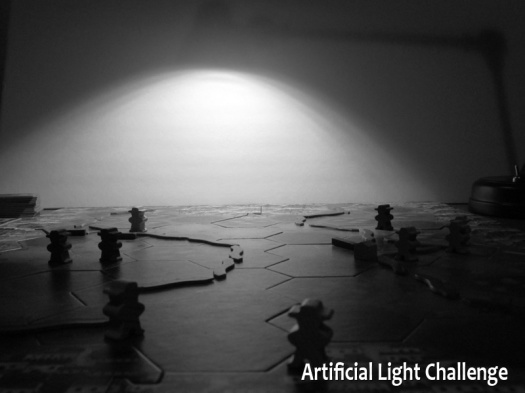
You need to get creative, even if your first idea starts falling apart before it ever happens. So I had easily sunken an hour into playing this board game by myself and setting up the equipment, I wasn’t going to just pack everything back up because idea #1 was not going smoothly. As I continued to play with the composition and camera position I noticed the lamps figure produced a shadow that bounced off the backdrop board – so I tried using that instead. After that first shot I tried playing with the camera settings to achieve different effects.
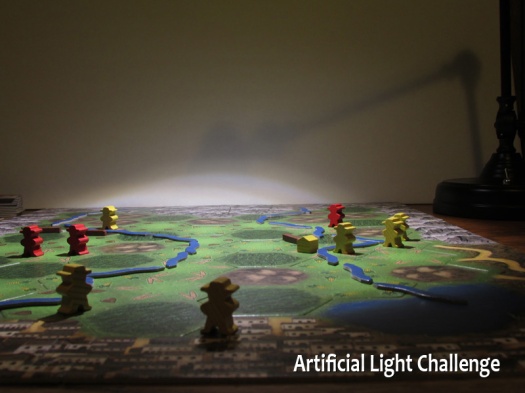
You can see the shadow of the lamp in this image. Originally I wanted the board centered in the image with the lamp off to the right and other game pieces on the left to balance it. The board was too small – you could see my walls & blinds when I zoomed out to get it.
With a new found enthusiasm I continued taking pictures; zoomed in and out of the subject, re-positioned the tripod, placed the camera on the table and back on the tripod again. It was actually very enjoyable. The goal was to take a picture that would not be edited in anyway other than camera settings. This forced me to rethink the way I’ve been taking pictures. I’m not saying that many digital photographers skip this step, I’m saying that I have been skipping this vital step basically since I put my Canon AE-1 in the desk drawer. If you are interested in photography and are an amateur like myself, I highly recommend entering into challenges where your file is your submission – you might find it as helpful and exciting as I did.
Here’s a challenge for you:
Find a location to take some shots; however, take two shots: one of clear view of your subject and one with obstacles in the way to frame your subject. Here’s a couple of shots from the same location:
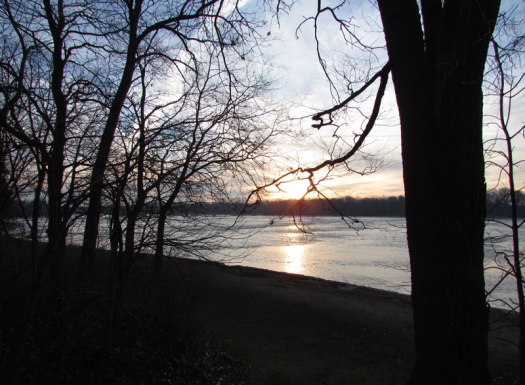
First shot, not minding my whereabouts.

Second shot: Trying to get a cleaner shot of the sun rise.
These have not gone through post production and they are not the most refined images I have taken, but this little photo accident produced a nice outcome by framing the sun rise.
This is a series or photos where the only dynamic was the lamp placement and the cameras allowance to automatically decide the f-stop; the shutter speed, iso, manual focus, placement of objects to be photographed as well as the placement of the camera remained stagnant. Non of these photos have been edited yet and I didn’t realize until today that my lens is dirty! Either way, I’m going to try to work with what I got and by this weekend I’ll have [some of] these on the gallery page of soft-graphix.com for others to see and use.

Light source (LED desk lamp that can be adjusted) is pointing toward the ceiling. Two white film boards act as the back drop and also allow light to reflect back onto the aloe plant and army toy.


Light source placed close and facing subject from right.

light source moved to the front and right – pointed toward white film backdrop and tilted up.
light source pointing down on the subject

light source pointing down and close to subject. I imagined summer at high noon with this position.
Balancing family, work, home, hobbies and anything else into your daily life can be a challenging task. In an ideal world, those things would all mesh together like bread and butter – In an ideal world. In reality, you tend to drop at least one of those things because 24 hours just simply is not enough. My ‘hobby’, for lack of a better term at the moment, is what I’ve left on the floor for a few weeks, or maybe months. So when a bit of inspiration collide with a quick ‘fashonable’ thought, I jump to it (causing my list of ‘things to do today’ to drop into chaos might I add). I’m sure you have all been there too. You get this grandiose idea that in hindsight is not so grandiose after all.

And all this babble leads us to the main context of this post, my incomplete website that I wrote gleefully about last post (check it out here: http://soft-graphix.com/2015sgx.html) The only thing I have left to do that I originally envisioned is the fonts; however I’m so displeased with the result that I think I’m just going back to the drawing board and in a whole new direction.
I did want to share this with you though. Even though I’m going to scrap it and start from scratch I still learned some very cool technique and wanted to share that in case this attempted site inspires anyone else.
Have you had a #websitefail you want to share?
So it’s been awhile since my last post… Sorry! I feel like life has been keeping me busy, so busy in fact that I think a whole year has swept past and I’ve neglected WordPress and blogging in general.
Completely unhappy with my google analytic results I’m back to the drawing board on my site – this time working with a responsive layout (not completely unfamiliar with it).
As for my idea of a new layout I would like to remove my current navigation. I do not have alot to offer in terms of pages on my site so instead I would like to have the ‘buttons’ be more images – large images/buttons on a desktop that scale down considerably on a mobile device.

I’ve been hitting a wall trying to figure out how to scale the div’s within a container to 100% height with pure css (though I’ve read flexbox is a solution, still wrapping my head around it). At this point I have decided to have large screens display a height in px while the mobile will automatically respond – this probably is not the ‘recommended’ way for a responsive design, but it will work for the time being.

< div class=”row” >
< div class=”col-3 dtH350″ >Free Photos< / div >
< div class=”col-6″ >
< div class=”col-6 dtH175″ >Illustrations< / div >
< div class=”col-6 dtH175″ >Nature< / div >
< div class=”col-12 dtH175″ >bottom< / div >
< / div >
…..
< / div >
